Git
This article describes some use-cases with Git.
Configure
Configurations can be global or per repository (saved inside the .git folder in your repo). The global settings are saved in ~/.gitconfig. You can always look and edit your ~/.gitconfig file manually, or use the git config --global command. Some examples how to set, unset or get settings:
Who are you?
Setup your name and email address:
Pager
You can specify which pager (e.g. more, less, cat) Git should use. Run this if you want to use cat:
Pretty log
To create aliases in Git, like a compact log when running 'git hist', run:
tformat has been used instead of format to get the ending carriage return in case you use cat as your pager. The output from 'git hist' will look like this:
* 40ec614 2012-12-10 | The best commit ever (HEAD, master) [Peter Kerwien]
* 4b732d0 2012-12-10 | Initial commit [Peter Kerwien]
Repository
Create repo
To create a git repository in a non-existing directory:
Or if you want to create a repository in the already existing directory:
Both commands will create a hidden directory named .git. These kind of repositories can also have a working tree, i.e. a workspace. If you want to create a repository and only use it as a central or shared repository between users, you should create a bare repository. A bare repository does not have a working tree, and all administration files are visible and not placed in a .git directory. To create a bare repository run:
The naming convention for bare repositories is to add .git in the end of the name.
Clone repo
To clone a repository, i.e. to get a copy of all its versions, run the command:
It does not matter if you clone a regular or bare repository, you will get a clone with a working tree. However, if you want a clone, and that clone should not have a working tree, then do a bare clone:
Your clone in dir will now be a bare repository.
Clean working directory
Your working directory will after some work, contain both version controlled files, modified files but also generated files, backup files etc. Some of the non-version controlled files are listed with the git status command, but many files could be ignored via so called .gitignore files. To clean your whole working directory from non-version controlled files, go to the top-directory in the repo, and run:
The command will remove all non-version controlled files, i.e. even ignored files. Use the -n option to just list which files the command will remove.
Track, commit and untrack changes
Track changes
To add one or several files to git, run:
If a file is already tracked, the command will add the changes to the index. If you want to add all changes made to already tracked files to the index, run:
Commit changes
To commit changes added to the index, run:
If you also want to commit all changes made in already tracked files, but not yet added to the index, run:
Untrack changes
To remove one or several files from the working tree and index, run:
The files will be removed from the repository when you do the commit.
Diff changes
Diff working directory
To look at the changes you have in your working directory which are not yet added to the index, run the command:
To look at the changes between your index and HEAD, run:
If you want to see all your non-committed changes (staged and non-staged), run:
Graphical diff using meld
If you have set up meld as your graphical diff-tool (See BBI Git#Using meld as graphical diff and merge tool (Optional)), you can perform graphical diff by running:
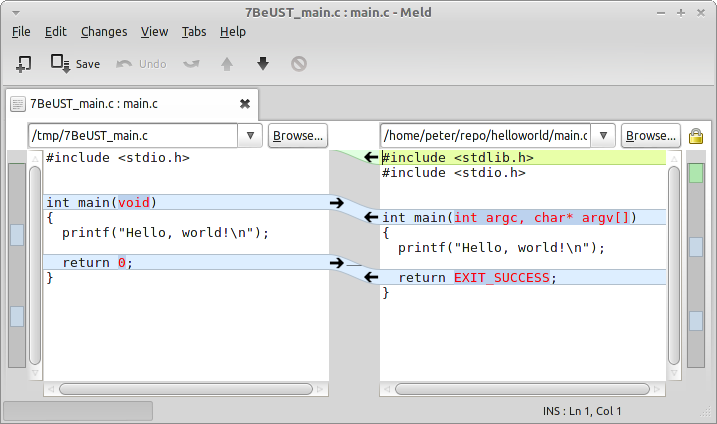
Just replace git diff with git difftool -g in the examples above. A diff with meld can look like this:
(To the left we have the original version and to the right our modified Makefile).
Diff commits
Assume we have the following history:
* 2634685 2012-12-18 | Commit 4 (HEAD, master) [Peter Kerwien]
* d0afcbd 2012-12-18 | Commit 3 [Peter Kerwien]
* aaa2574 2012-12-18 | Commit 2 [Peter Kerwien]
* b61568c 2012-12-18 | Initial commit [Peter Kerwien]
To look at the changes made in Commit 2 to 3 you can run:
Or you can also run:
Revision Selection
Ancestry References
Assume we have the following history:
* 5b38862 2013-01-16 | Commit 5 (HEAD, master) [Peter Kerwien]
*   9940a50 2013-01-16 | Commit 4 [Peter Kerwien]
|\
| * fc796ce 2013-01-16 | Commit on test (test) [Peter Kerwien]
* | f7935db 2013-01-16 | Commit 3 [Peter Kerwien]
|/
* dc53825 2013-01-16 | Commit 2 [Peter Kerwien]
* bea9676 2013-01-16 | Initial commit [Peter Kerwien]
Instead of using the full hash to select version, you can use ancestry references by adding ^ and ~ after the version. HEAD^ means the first parent to HEAD (=9940a50). The commit 9940a50 however has two parents, so 9940a50^ will select the one on current branch. If we are master, 9940a50^ will select the commit f7935db. 9940a50^2 will select the second parent, in this case fc796ce. You can also add several ^ after each other. HEAD^^ will select the commit f7935db.
~ always means the first parent of a commit. So HEAD~ and HEAD^ means the same thing. However, HEAD~2 means the first parent of the first parent, so 9940a50~2 selects the commit dc53825, which is not the same as 9940a50^2.
You can combine these two into something like HEAD~^2. This means the second parent of the first parent of HEAD i.e. the commit fc796ce.
Undo
Undo not yet staged change
To undo changes that you have not yet been staged, run:
Undo a staged change
To undo staged changes, run:
The reset command resets the staging area to be whatever is in HEAD. This clears the staging area of the change we just staged. The reset command (by default) doesn’t change the working directory. So the working directory still has the unwanted comment in it.
Correct the last commit
If you realize that something was missing in the last commit and you do not want to make another, you can correct your mistakes and then run:
Undo a commit
To undo a committed change, we need to generate a commit that removes the changes introduced by our unwanted commit. To revert last commit run:
If you want to revert any commit, replace HEAD with the commit hash. Use the option --no-edit if you want to accept to default revert message.
Remove commits from branch
When undoing a commit with git revert, both the incorrect and the revert commit are still visible in the history. If want to undo things and erase the commits from the history, you can move the HEAD pointer back to an earlier commit and start over. Assume you have a history like this:
* e5f1c95 2012-12-10 | Another good commit (HEAD, master) [Peter Kerwien]
* e491e6d 2012-12-10 | Good commit [Peter Kerwien]
* ba30da7 2012-12-10 | Bad commit [Peter Kerwien]
* 4b732d0 2012-12-10 | Initial commit [Peter Kerwien]
If you want to throw away the 3 last commits, you can move HEAD to the initial commit by:
When you then perform a new commit, your history will look like:
* 40ec614 2012-12-10 | The best commit ever (HEAD, master) [Peter Kerwien]
* 4b732d0 2012-12-10 | Initial commit [Peter Kerwien]
git reset --hard will also erase all your non-committed changes in your working directory. If you want to keep both your non-staged and staged changes, use instead the --soft option. The commits that were discarded, are still available until the system runs the garbage collection. If can either use a tag before you do reset for easier access, or use the command git reflog to see where your HEAD have been earlier.
Branch
Create and switch to branch
If you want to create and switch to a branch called test, run:
You can also specify another starting point than HEAD by:
List branches
To list all local branches, run:
The asterisk (*) marks current branch. If you also want to see remote branches, run:
If you want to list all local branches that starts with te, run:
Switch between branches
It is very easy to switch between branches, just run:
Git will warn you and stop if you have local changes that are not committed when you try to switch branches.
Rename a branch
To rename the branch test to dev, run:
Delete a branch
To delete a branch called test, run:
Git will warn you if the branch has not been fully merged. To delete even if not merged, just run:
Track a local branch from another repo
Two users have cloned the same repository (helloworld.git). User A creates a local branch called test:
Then performs a change and commits it:
Now user B wants to follow / track this branch. B must first add A's repository as a remote:
In this example B will call the remote hello_a (helloworld from user A) and the URL is just the absolute path to the repository):
Display the details about remote hello_a with the command:
* remote hello_a
  Fetch URL: /home/peter/git/helloworld
  Push  URL: /home/peter/git/helloworld
  HEAD branch: test
  Remote branches:
    master new (next fetch will store in remotes/hello_a)
    test   new (next fetch will store in remotes/hello_a)
  Local ref configured for 'git push':
    master pushes to master (up to date)
Before B can track the test branch, B must fetch heads, tags and objects from A's repository:
remote: Counting objects: 5, done.
remote: Compressing objects: 100% (3/3), done.
remote: Total 3 (delta 2), reused 0 (delta 0)
Unpacking objects: 100% (3/3), done.
From /home/peter/git/helloworld
* [new branch]      master     -> hello_a/master
* [new branch]      test       -> hello_a/test
B can now create a local branch called test which tracks A's test branch:
Switch to the test branch:
Merge
Different merges in git
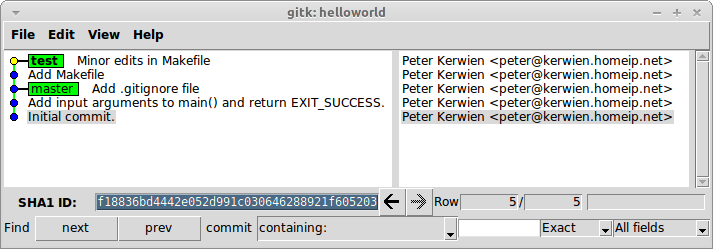
In the following examples we have made 2 commits on branch called test:
No merge needed (default)
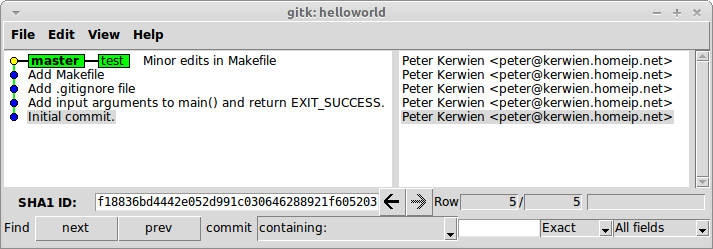
If no commits have been made on the master branch, git will use a so-called fast-forward (default) if we merge test to master:
It only moves HEAD forward. So all commits we have made on test branch, is only "moved" to master. If we push to origin, we will push 2 commits.
No merge needed but with --no-ff
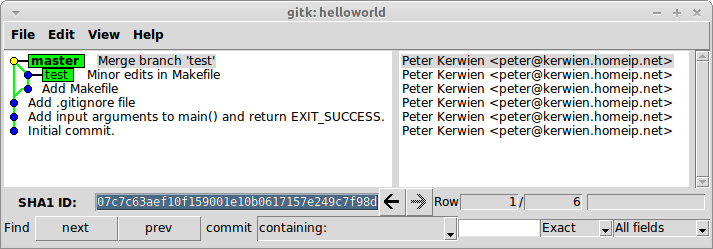
If no commits have been made on the master branch, git will use a so-called fast-forward (default), but in this case we add the --no-ff option during merge:
Git now creates a merge commit on master.
Merge needed
Assume that someone has made a new commit on master after we branched:
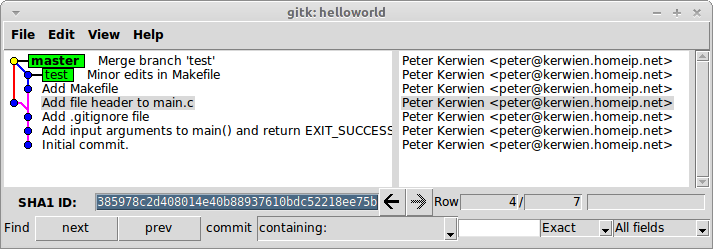
In this case, git must do a regular merge, so we do not have to provide the --no-ff option:
Git now creates a merge commit on master.
Resolve merge conflicts with meld
If you have set up meld as your graphical merge-tool (See BBI Git#Using meld as graphical diff and merge tool (Optional)), you can perform graphical merge by running:
Example: After a merge from test branch to master, git prints out the following:
Auto-merging main.c
CONFLICT (content): Merge conflict in main.c
Auto-merging Makefile
CONFLICT (content): Merge conflict in Makefile
Automatic merge failed; fix conflicts and then commit the result.
Start the graphical merge:
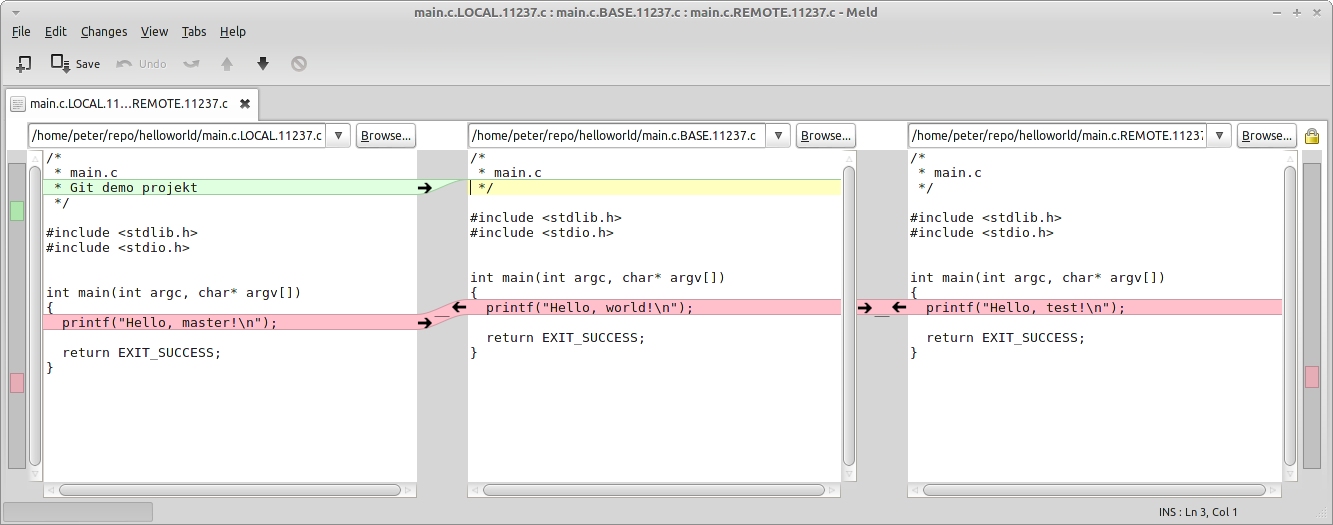
Each file will be opened in meld for resolving the conflicts. With the configuration where meld is given 4 arguments, it will resolve all non-conflicting changes, and then leave the rest for the user to resolve. The meld window is divided into three parts. From left to right we have:
- The version on master branch (to-version)
- The merge result
- The version on test branch (from-version)
Resolve the merge by selecting the code from the left or right section into the middle section. You can also edit the code in the middle section to create the correct merge result. When done save the result.
When you have resolved the conflicts, commit the merge result.
Rebase
Rebase is a way to forward-port your commits to a new upstream HEAD. Assume we have made 2 commits on a test branch. After we branched, someone has made a new commit on master:
Instead of merging from master to test, we can forward-port our 2 commits. While on test branch, run the command:
In this example we will not have any merge conflicts, so git will automatically do the rebase for us:
First, rewinding head to replay your work on top of it...
Applying: Added unused attribute on argc & argv
Applying: Replaced __attribute__((unused)) with -Wno-unused-parameter
Our 2 commits have now been modified and based on the new HEAD on master:
However, rebasing your local branch is preferred over merge, since you will create a cleaner history tree. It does not matter if you merge or rebase, any conflicts have to be resolved. If we now do a merge on master from test, git will default do a fast-forward merge (see #No merge needed (default)
Cherry-pick
Simple cherry-picking without conflict
If you want to apply changes from one branch to another, but you want to select exactly which commits to choose, you can do a so called cherry-pick. Assume we have the following history:
* b5df0bb 2012-12-17 | Added main() header (HEAD, test) [Peter Kerwien]
| * 12ad7c3 2012-12-17 | Whitespace edit in main.c (master) [Peter Kerwien]
| * f39ba2f 2012-12-14 | Add some file headers [Peter Kerwien]
| * 02d1638 2012-12-14 | Change hello message [Peter Kerwien]
|/
* 0e1085d 2012-12-14 | Made some cleanup [Peter Kerwien]
* 10213e2 2012-12-14 | Initial commit [Peter Kerwien]
We want to apply the commit f39ba2f to our test branch. To do that, switch to the test branch and run:
[test 81d9476] Add some file headers
2 files changed, 4 insertions(+)
The history will now look like:
* 81d9476 2012-12-14 | Add some file headers (HEAD, test) [Peter Kerwien]
* b5df0bb 2012-12-17 | Added main() header [Peter Kerwien]
| * 12ad7c3 2012-12-17 | Whitespace edit in main.c (master) [Peter Kerwien]
| * f39ba2f 2012-12-14 | Add some file headers [Peter Kerwien]
| * 02d1638 2012-12-14 | Change hello message [Peter Kerwien]
|/
* 0e1085d 2012-12-14 | Made some cleanup [Peter Kerwien]
* 10213e2 2012-12-14 | Initial commit [Peter Kerwien]
Note that the commit f39ba2f is called 81d9476 on our test branch.
Multiple cherry-picking with conflict
During cherry-picking, conflicts might have to be resolved. In this example, we will cherry-pick two commits, where the first one will conflict with our changes on the test branch. Assume the following history:
* e108d4a 2012-12-17 | Hello test! (HEAD, test) [Peter Kerwien]
| * fdb65d7 2012-12-17 | Return EXIT_SUCCESS instead of 0 (master) [Peter Kerwien]
| * 69e7150 2012-12-17 | Added argc & argv parameters to main() [Peter Kerwien]
| * 413565e 2012-12-17 | Changed hello message [Peter Kerwien]
|/
* 3ff2e68 2012-12-17 | Initial commit [Peter Kerwien]
Switch to the test branch, and cherry-pick commits 413565e and fdb65d7. The first one will conflict with our commit e108d4a:
error: could not apply 413565e... Changed hello message

hint: after resolving the conflicts, mark the corrected paths

hint: with 'git add <paths>' or 'git rm <paths>'

hint: and commit the result with 'git commit'
Resolve the conflict and commit the merge result. Now, to continue the cherry-picking, run the command:
esekilxxen1924> git cherry-pick --continue

[test 9eac083] Return EXIT_SUCCESS instead of 0

1 file changed, 2 insertions(+), 1 deletion(-)
Now our history looks like:
* 9eac083 2012-12-17 | Return EXIT_SUCCESS instead of 0 (HEAD, test) [Peter Kerwien]
* bfc1ad9 2012-12-17 | Changed hello message [Peter Kerwien]
* e108d4a 2012-12-17 | Hello test! [Peter Kerwien]
| * fdb65d7 2012-12-17 | Return EXIT_SUCCESS instead of 0 (master) [Peter Kerwien]
| * 69e7150 2012-12-17 | Added argc & argv parameters to main() [Peter Kerwien]
| * 413565e 2012-12-17 | Changed hello message [Peter Kerwien]
|/
* 3ff2e68 2012-12-17 | Initial commit [Peter Kerwien]
We have now applied the two commits, with the new hash values bfc1ad9 and 9eac083.
Squash
When doing a push, several commits might be pushed. This is not always a wanted behaviour, since it might be a lot of commits from our local development branch. If you push to a central repository, all you intermediate commits will be visible to others that clones this repository. If you want to push a feature as one single commit, you can use squashing. A squash will create a new commit which is the summary of several commits.
Assume we have developed a feature on a branch called test. Everything is rebased to latest commit on master:
Create a new branch from master called test-squashed:
Merge all commits made on test, but create one single commit of them:
Commit the changes:
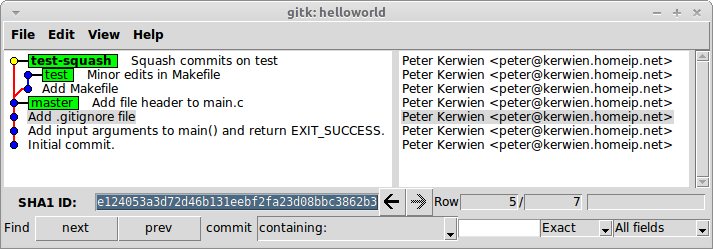
We have now created one commit on the test-squash branch, which has the complete contents of the commits on the test branch:
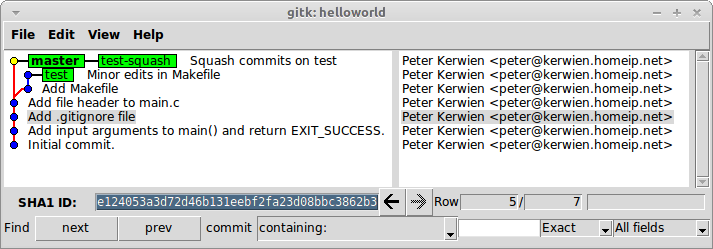
Switch to master and merge from test-squash (fast-forward merge):
If we push to origin/master, only one commit will be added:
Terminology
| Term | Description |
|---|---|
| Bare repository | A Git repository without a working directory |
| Clone | A copy of a repository. The clone will contain all existing versions. |
| Working directory | The directory containing your checked out files. Where you can edit and commit your changes. |
| HEAD | A pointer to the currently selected commit in your repository |
| Staged | Added to the index, not yet committed |
| Cached | See staged |
| Tracked file | A file that is added and version controlled in git |
| Untracked file | A file that is not version controlled in git |
| Index | The content of tracked files that will be committed if you run the git commit command. |

