Git: Difference between revisions
mNo edit summary |
|||
| Line 305: | Line 305: | ||
=== Resolve merge conflicts with meld === | === Resolve merge conflicts with meld === | ||
If you have set up meld as your graphical merge-tool (See [[ | If you have set up meld as your graphical merge-tool (See [[?]]), you can perform graphical merge by running: | ||
{{Cmd|git mergetool}} | {{Cmd|git mergetool}} | ||
Revision as of 19:00, 19 April 2013
Denna artikel beskriver några kommandon och användarfall med git.
(Jag håller på att skriva om sidan från engelska till svenska då jag nu insåg att alla mina andra sidor är på svenska.)
Inställningar
Git inställningar kan var global eller per repository (sparade under .git mappen i ett repository). Globala inställningar är sparade i filen ~/.gitconfig. Det går att läsa och editera filen ~/.gitconfig manuellt, eller använda kommandot git config --global. Några exempel hur man sätter, tar bort och läser inställningar:
Vem är du?
Ställ in namn och email adress:
Pager
Du kan välja vilken 'pager' (t.ex. more, less, cat) Git ska använda. Kör detta kommando om du vill att Git ska använda cat:
Snyggare log
För att skapa alias i Git, som t.ex. att skriva ut en kompakt och snygg log med kommandot git hist, kör kommandot:
Vi använder tformat istället för format för att få med ett avslutande 'carriage return' ifall du använder cat som din pager. Utskriften från git hist kommer att se ut så här:
* 40ec614 2012-12-10 | The best commit ever (HEAD, master) [Peter Kerwien]
* 4b732d0 2012-12-10 | Initial commit [Peter Kerwien]
Repository
Skapa ett repository
För att skapa ett repository i en icke-existerande katalog, kör:
Eller om du vill skapa ett repository i nuvarande katalog:
Båda kommandona kommer skapa en dold katalog som heter .git. Dessa repositoryn kan också innehålla filerna som man jobbar med dvs ett 'workspace'. Om du vill skapa ett repository som ska fungera som ett centralt repository eller dela mellan flera användare och alla ska kunna pusha till repositoryt så måste man skapa ett s.k. bare repository. Ett bare repository saknar workspace och alla git-filer ligger synliga direkt i repositoryt och inte i en katalog som heter .git. För att skapa ett bare repository, kör::
Namnkonventionen är att bare repositorys slutar med ändelsen .git i namnet.
Klona ett repository
För att klona ett repository, dvs skapa en kopia av alla dess versioner, kör:
Det spelar ingen roll om du klonar ett vanligt eller bare repository, du kommer få en klon med ett workspace. Men om du vill klona utan ett workspace, kör kommandot:
Din klon med namnet dir kommer nu inte innehålla något workspace.
Rensa workspace
Efter en del arbete kommer ditt workspace innehålla versionshanterade, ändrade men också genererade och backup-filer. En del av de icke-versionshanterade filerna listas med git status, men en del filer ignoreras via en .gitignore fil. För att rensa hela ditt workspace från alla icke-versionshanterade inklusive ignorerade filer, gå till toppen av repositoryt och kör:
Använd -n optionen för att endast lista vilka filer som skulle ha raderats.
Versionshantera, komitta och sluta versionshantera förändringar
Versionshantera förändringar
För att addera en eller flera filer till git, kör:
Om en fil redan versionshanteras, kommer kommandot att addera förändringar till index. Om du vill addera alla gjorda förändringar till index, kör kommandot:
Kommitta förändringar
För att kommitta förändringar redan adderade till index, kör:
Om du vill kommitta alla ändringar som är gjorda i redan versionshanterade filer, men ej adderade till index, kör kommandot:
Sluta versionshantera förändringar
För att ta bort en eller flera filer från workspace och index, kör kommandot:
Filerna kommer att tas bort från repositoryt när du kommittar till repositoryt.
Lista förändringar
Lista förändringar i workspace
För att lista förändringar du har gjort i workspace, men som inte än är adderade till index, kör kommandot:
För att lista förändringar mellan ditt index och HEAD, dvs versionen du ser i repositoryt, kör kommandot:
Om du vill se alla dina icke-kommittade förändringar (både adderade till index eller inte), kör kommandot:
Graphical diff using meld
If you have set up meld as your graphical diff-tool (See BBI Git#Using meld as graphical diff and merge tool (Optional)), you can perform graphical diff by running:
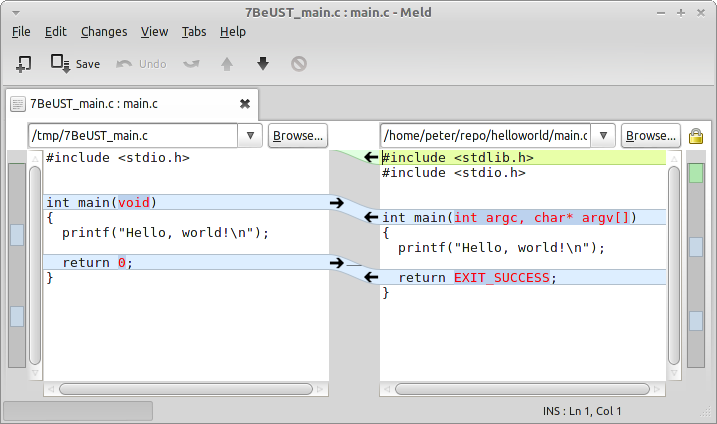
Just replace git diff with git difftool -g in the examples above. A diff with meld can look like this:
(To the left we have the original version and to the right our modified Makefile).
Jämföra kommitter
Antag att vi har följande historia:
* 2634685 2012-12-18 | Commit 4 (HEAD, master) [Peter Kerwien]
* d0afcbd 2012-12-18 | Commit 3 [Peter Kerwien]
* aaa2574 2012-12-18 | Commit 2 [Peter Kerwien]
* b61568c 2012-12-18 | Initial commit [Peter Kerwien]
För att visa alla förändringar mellan kommit 2 och 3, kör:
Du kan också köra kommandot:
Välja revision
Släkt-referenser
Antag att vi har följande historia:
* 5b38862 2013-01-16 | Commit 5 (HEAD, master) [Peter Kerwien]
*   9940a50 2013-01-16 | Commit 4 [Peter Kerwien]
|\
| * fc796ce 2013-01-16 | Commit on test (test) [Peter Kerwien]
* | f7935db 2013-01-16 | Commit 3 [Peter Kerwien]
|/
* dc53825 2013-01-16 | Commit 2 [Peter Kerwien]
* bea9676 2013-01-16 | Initial commit [Peter Kerwien]
Istället för att ange hela hashen för att välja version, kan man ange släkt-referenser genom att addera ^ eller ~ efter versionen. HEAD^ betyder den första föräldern till HEAD (=9940a50). Kommitten 9940a50 har två föräldrar, därför väljer 9940a50^ den föräldern som finns på nuvarande branch. Om vi är på master så kommer 9940a50^ välja kommitten f7935db. 9940a50^2 kommer välja den andre föräldern, i detta fall fc796ce. Man kan också lägga till flera ^ efter varandra. HEAD^^ kommer välja kommitt f7935db.
~ däremot betyder alltid den första föräldern av en commit. Så HEAD~ och HEAD^ betyder alltid samma sak. Men HEAD~2 betyder "första föräldern till första föräldern", så 9940a50~2 väljer kommitten dc53825. Detta är inte samma sak som 9940a50^2.
Man kan kombinera dessa två, t.ex. HEAD~^2. Detta betyder "den andra föräldern till den första förälderna av HEAD", dvs kommitten fc796ce.
Ångra och förändra
Ångra ändringar som inte har adderats till index
För att ångra ändringar som inte har adderats till index, kör kommandot:
Ångra ändringar som har adderats till index
För att ångra ändringar som har adderats till index, kör:
Reset kommandot återställer index till vad som pekas ut av HEAD. Reset kommandot återståller inte workspace. Så workspace kan fortfarande innehålla oönskade ändringar.
Rätta den senaste kommitten
Om du upptäcker att någonting saknas i den senaste kommitten och du vill inte göra en ny, då kan du rätta till ditt misstag med kommandot:
Du måste dock först addera vad du saknade till index innan du kör kommandot ovan.
Ångra en kommit
För att ångra en kommitt kan vi skapa en kommitt som tar bort dom förändringar som gjordes i den oönskade kommitten. För att ånga den senaste gjorda kommitten kör kommandot:
Om du vill ångra någon annan kommitt, ersätt HEAD med kommit hashen. Använd optionen --no-edit om du vill acceptera standard kommitt meddelandet för en revert.
Ta bort en kommitt på en branch
När man ångrar en kommitt med git revert kommer både den felaktiga och återställningen synas i historian. Om man vill ångra kommitten och radera den från historian kan man flytta HEAD pekaren tillbaka till kommitten före den felaktiga och börja om från början. Antag att man har en historia som ser ut så här:
* e5f1c95 2012-12-10 | Another good commit (HEAD, master) [Peter Kerwien]
* e491e6d 2012-12-10 | Good commit [Peter Kerwien]
* ba30da7 2012-12-10 | Bad commit [Peter Kerwien]
* 4b732d0 2012-12-10 | Initial commit [Peter Kerwien]
Om man vill slänga bort dom 3 senaste kommittsen kan man flytta HEAD till kommitt 4b732d0 med kommandot:
När man sen genomför en ny kommit, kommer historian se ut så här:
* 40ec614 2012-12-10 | The best commit ever (HEAD, master) [Peter Kerwien]
* 4b732d0 2012-12-10 | Initial commit [Peter Kerwien]
git reset --hard kommer även radera ev. icke-kommittade ändringar i workspace. Om du vill spara alla förändringar (oavsett om de adderats till index eller inte), använd istället --soft optionen. De kommitts som blev slängda kommer fortfarande finnas kvar tills man städar repositoryt. Man kommer åt dessa kommitts via deras hash eller taggar. Man kan köra kommandot git reflog för att se var HEAD varit den senaste tiden.
Branch
Create and switch to branch
If you want to create and switch to a branch called test, run:
You can also specify another starting point than HEAD by:
List branches
To list all local branches, run:
The asterisk (*) marks current branch. If you also want to see remote branches, run:
If you want to list all local branches that starts with te, run:
Switch between branches
It is very easy to switch between branches, just run:
Git will warn you and stop if you have local changes that are not committed when you try to switch branches.
Rename a branch
To rename the branch test to dev, run:
Delete a branch
To delete a branch called test, run:
Git will warn you if the branch has not been fully merged. To delete even if not merged, just run:
Track a local branch from another repo
Two users have cloned the same repository (helloworld.git). User A creates a local branch called test:
Then performs a change and commits it:
Now user B wants to follow / track this branch. B must first add A's repository as a remote:
In this example B will call the remote hello_a (helloworld from user A) and the URL is just the absolute path to the repository):
Display the details about remote hello_a with the command:
* remote hello_a
  Fetch URL: /home/peter/git/helloworld
  Push  URL: /home/peter/git/helloworld
  HEAD branch: test
  Remote branches:
    master new (next fetch will store in remotes/hello_a)
    test   new (next fetch will store in remotes/hello_a)
  Local ref configured for 'git push':
    master pushes to master (up to date)
Before B can track the test branch, B must fetch heads, tags and objects from A's repository:
remote: Counting objects: 5, done.
remote: Compressing objects: 100% (3/3), done.
remote: Total 3 (delta 2), reused 0 (delta 0)
Unpacking objects: 100% (3/3), done.
From /home/peter/git/helloworld
* [new branch]      master     -> hello_a/master
* [new branch]      test       -> hello_a/test
B can now create a local branch called test which tracks A's test branch:
Switch to the test branch:
Merge
Different merges in git
In the following examples we have made 2 commits on branch called test:
No merge needed (default)
If no commits have been made on the master branch, git will use a so-called fast-forward (default) if we merge test to master:
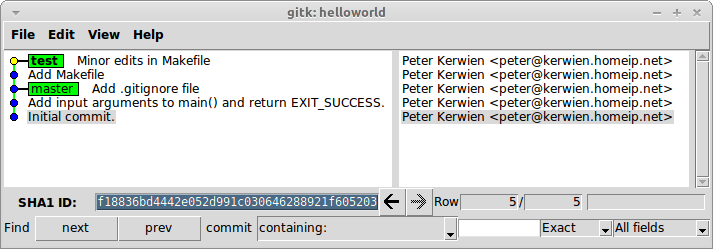
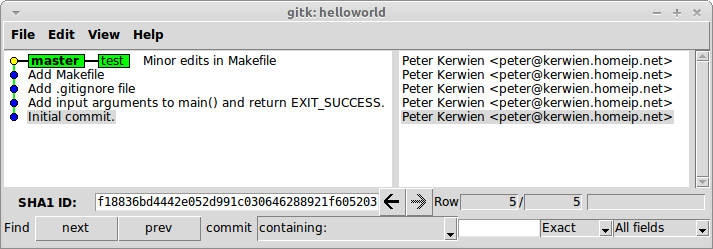
It only moves HEAD forward. So all commits we have made on test branch, is only "moved" to master. If we push to origin, we will push 2 commits.
No merge needed but with --no-ff
If no commits have been made on the master branch, git will use a so-called fast-forward (default), but in this case we add the --no-ff option during merge:
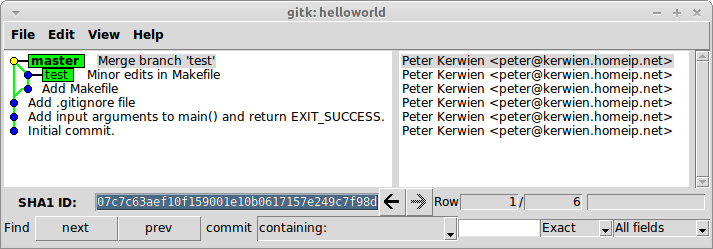
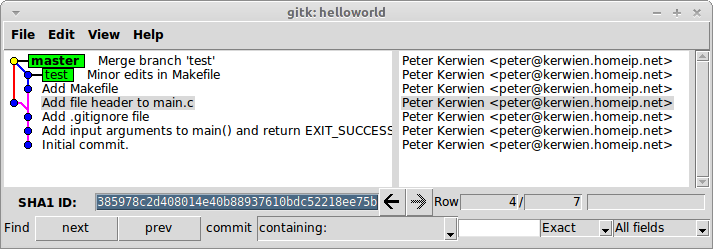
Git now creates a merge commit on master.
Merge needed
Assume that someone has made a new commit on master after we branched:
In this case, git must do a regular merge, so we do not have to provide the --no-ff option:
Git now creates a merge commit on master.
Resolve merge conflicts with meld
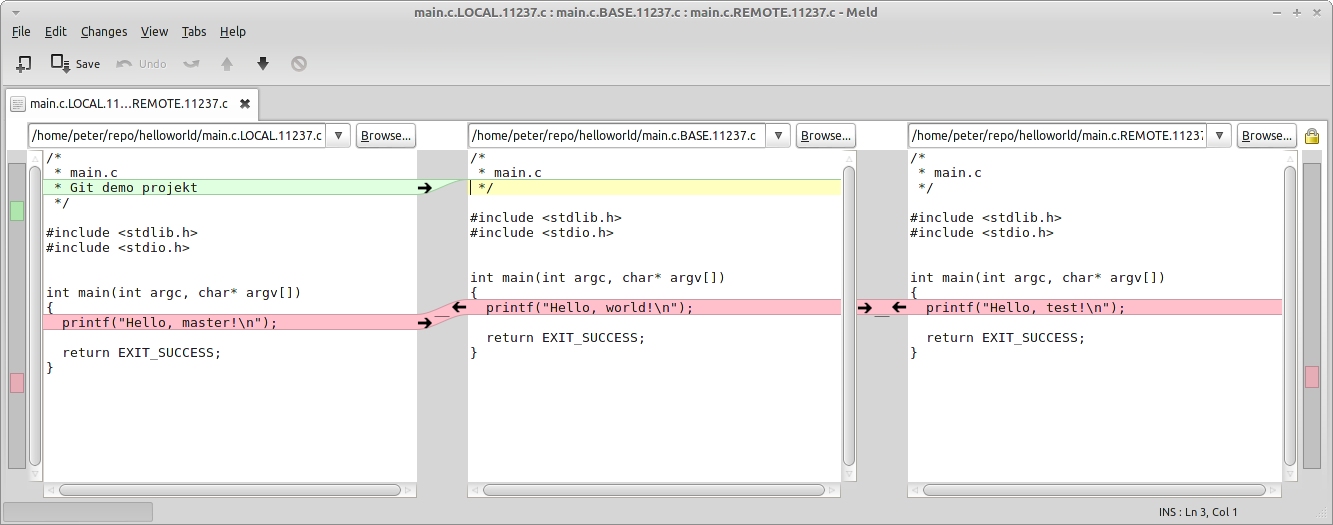
If you have set up meld as your graphical merge-tool (See ?), you can perform graphical merge by running:
Example: After a merge from test branch to master, git prints out the following:
Auto-merging main.c
CONFLICT (content): Merge conflict in main.c
Auto-merging Makefile
CONFLICT (content): Merge conflict in Makefile
Automatic merge failed; fix conflicts and then commit the result.
Start the graphical merge:
Each file will be opened in meld for resolving the conflicts. With the configuration where meld is given 4 arguments, it will resolve all non-conflicting changes, and then leave the rest for the user to resolve. The meld window is divided into three parts. From left to right we have:
- The version on master branch (to-version)
- The merge result
- The version on test branch (from-version)
Resolve the merge by selecting the code from the left or right section into the middle section. You can also edit the code in the middle section to create the correct merge result. When done save the result.
When you have resolved the conflicts, commit the merge result.
Rebase
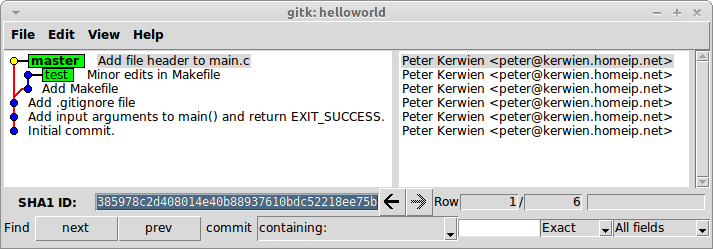
Rebase is a way to forward-port your commits to a new upstream HEAD. Assume we have made 2 commits on a test branch. After we branched, someone has made a new commit on master:
Instead of merging from master to test, we can forward-port our 2 commits. While on test branch, run the command:
In this example we will not have any merge conflicts, so git will automatically do the rebase for us:
First, rewinding head to replay your work on top of it...
Applying: Added unused attribute on argc & argv
Applying: Replaced __attribute__((unused)) with -Wno-unused-parameter
Our 2 commits have now been modified and based on the new HEAD on master:
However, rebasing your local branch is preferred over merge, since you will create a cleaner history tree. It does not matter if you merge or rebase, any conflicts have to be resolved. If we now do a merge on master from test, git will default do a fast-forward merge (see #No merge needed (default)
Cherry-pick
Simple cherry-picking without conflict
If you want to apply changes from one branch to another, but you want to select exactly which commits to choose, you can do a so called cherry-pick. Assume we have the following history:
* b5df0bb 2012-12-17 | Added main() header (HEAD, test) [Peter Kerwien]
| * 12ad7c3 2012-12-17 | Whitespace edit in main.c (master) [Peter Kerwien]
| * f39ba2f 2012-12-14 | Add some file headers [Peter Kerwien]
| * 02d1638 2012-12-14 | Change hello message [Peter Kerwien]
|/
* 0e1085d 2012-12-14 | Made some cleanup [Peter Kerwien]
* 10213e2 2012-12-14 | Initial commit [Peter Kerwien]
We want to apply the commit f39ba2f to our test branch. To do that, switch to the test branch and run:
[test 81d9476] Add some file headers
2 files changed, 4 insertions(+)
The history will now look like:
* 81d9476 2012-12-14 | Add some file headers (HEAD, test) [Peter Kerwien]
* b5df0bb 2012-12-17 | Added main() header [Peter Kerwien]
| * 12ad7c3 2012-12-17 | Whitespace edit in main.c (master) [Peter Kerwien]
| * f39ba2f 2012-12-14 | Add some file headers [Peter Kerwien]
| * 02d1638 2012-12-14 | Change hello message [Peter Kerwien]
|/
* 0e1085d 2012-12-14 | Made some cleanup [Peter Kerwien]
* 10213e2 2012-12-14 | Initial commit [Peter Kerwien]
Note that the commit f39ba2f is called 81d9476 on our test branch.
Multiple cherry-picking with conflict
During cherry-picking, conflicts might have to be resolved. In this example, we will cherry-pick two commits, where the first one will conflict with our changes on the test branch. Assume the following history:
* e108d4a 2012-12-17 | Hello test! (HEAD, test) [Peter Kerwien]
| * fdb65d7 2012-12-17 | Return EXIT_SUCCESS instead of 0 (master) [Peter Kerwien]
| * 69e7150 2012-12-17 | Added argc & argv parameters to main() [Peter Kerwien]
| * 413565e 2012-12-17 | Changed hello message [Peter Kerwien]
|/
* 3ff2e68 2012-12-17 | Initial commit [Peter Kerwien]
Switch to the test branch, and cherry-pick commits 413565e and fdb65d7. The first one will conflict with our commit e108d4a:
error: could not apply 413565e... Changed hello message
hint: after resolving the conflicts, mark the corrected paths
hint: with 'git add <paths>' or 'git rm <paths>'
hint: and commit the result with 'git commit'
Resolve the conflict and commit the merge result. Now, to continue the cherry-picking, run the command:
$ git cherry-pick --continue
[test 9eac083] Return EXIT_SUCCESS instead of 0
1 file changed, 2 insertions(+), 1 deletion(-)
Now our history looks like:
* 9eac083 2012-12-17 | Return EXIT_SUCCESS instead of 0 (HEAD, test) [Peter Kerwien]
* bfc1ad9 2012-12-17 | Changed hello message [Peter Kerwien]
* e108d4a 2012-12-17 | Hello test! [Peter Kerwien]
| * fdb65d7 2012-12-17 | Return EXIT_SUCCESS instead of 0 (master) [Peter Kerwien]
| * 69e7150 2012-12-17 | Added argc & argv parameters to main() [Peter Kerwien]
| * 413565e 2012-12-17 | Changed hello message [Peter Kerwien]
|/
* 3ff2e68 2012-12-17 | Initial commit [Peter Kerwien]
We have now applied the two commits, with the new hash values bfc1ad9 and 9eac083.
Squash
When doing a push, several commits might be pushed. This is not always a wanted behaviour, since it might be a lot of commits from our local development branch. If you push to a central repository, all you intermediate commits will be visible to others that clones this repository. If you want to push a feature as one single commit, you can use squashing. A squash will create a new commit which is the summary of several commits.
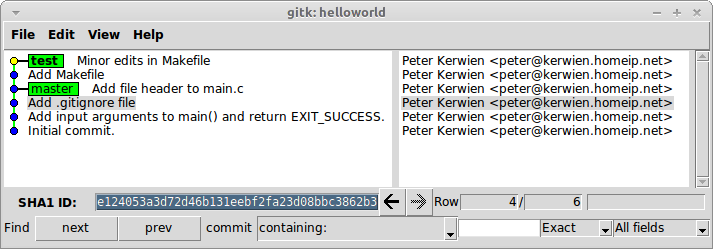
Assume we have developed a feature on a branch called test. Everything is rebased to latest commit on master:
Create a new branch from master called test-squashed:
Merge all commits made on test, but create one single commit of them:
Commit the changes:
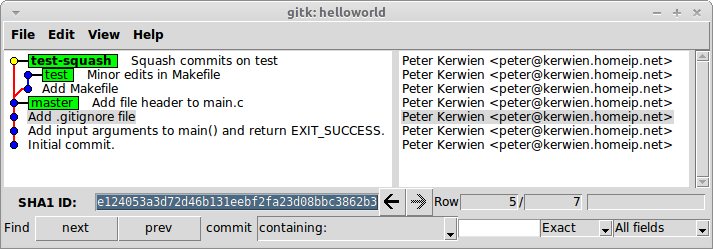
We have now created one commit on the test-squash branch, which has the complete contents of the commits on the test branch:
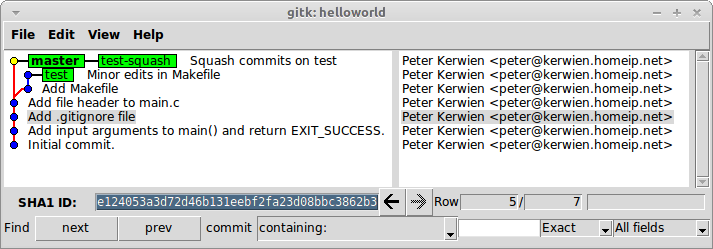
Switch to master and merge from test-squash (fast-forward merge):
If we push to origin/master, only one commit will be added:
Terminology
| Term | Description |
|---|---|
| Bare repository | A Git repository without a working directory |
| Clone | A copy of a repository. The clone will contain all existing versions. |
| Working directory | The directory containing your checked out files. Where you can edit and commit your changes. |
| HEAD | A pointer to the currently selected commit in your repository |
| Staged | Added to the index, not yet committed |
| Cached | See staged |
| Tracked file | A file that is added and version controlled in git |
| Untracked file | A file that is not version controlled in git |
| Index | The content of tracked files that will be committed if you run the git commit command. |

